
How to install Sleeper Pro on a Triumph Bonneville Bobber & SpeedmasterUpdated 2 years ago
HOW TO INSTALL SLEEPER PRO ON A TRIUMPH BONNEVILLE BOBBER
Step by step guide on how to install the sleeper pro on a Triumph Bonneville Bobber & Triumph Bonneville Speedmaster
THE INSTALLATION GUIDE APPLIES TO THE FOLLOWING TRIUMPH MOTORCYCLES:
- Triumph Bonneville Bobber
- Triumph Bonneville Bobber Black
- Triumph Bonneville Speedmaster
HOW TO REMOVE THE EXHAUST
Note: Removal is very similar for the left and right sides of the motorcycle
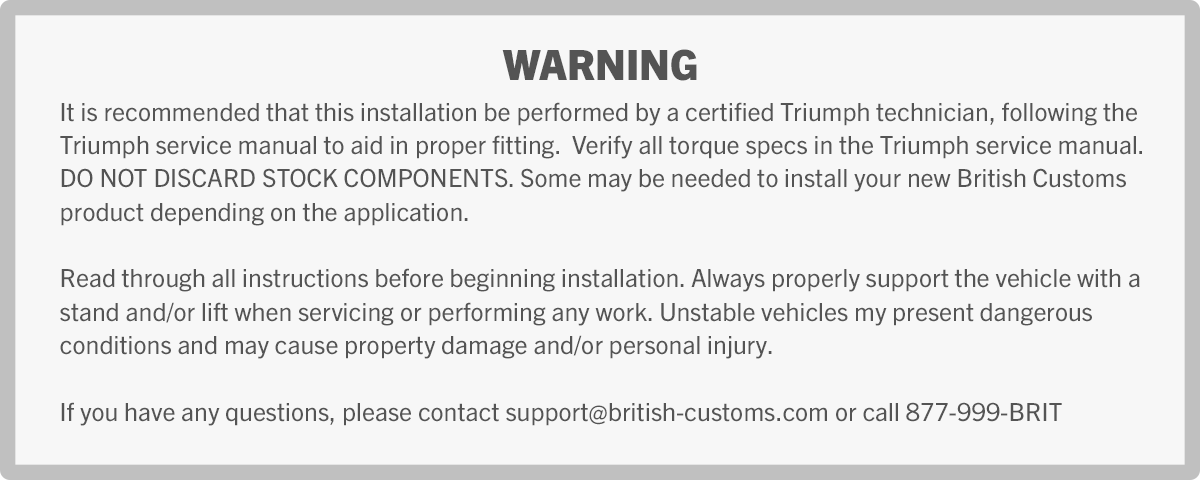
1 - Use a 12mm socket to slightly loosen the head pipe flange nuts.

2 - Loosen the four (2) clamps on the catalytic converter with a 10mm wrench
3 - Use a 5 mm Allen to remove the heat shield clamp bolt (on the left-hand side, remove the heat shield mid-section.)
4 - On Speedmaster Models, use 5mm Allen and remove the rear brake lever clevis bolt and slide clevis off the shaft. Gently move clevis and linkage out of the way. 
5 - Use a 12 mm wrench to remove the rear mounting bolt on the underside of the silencer.

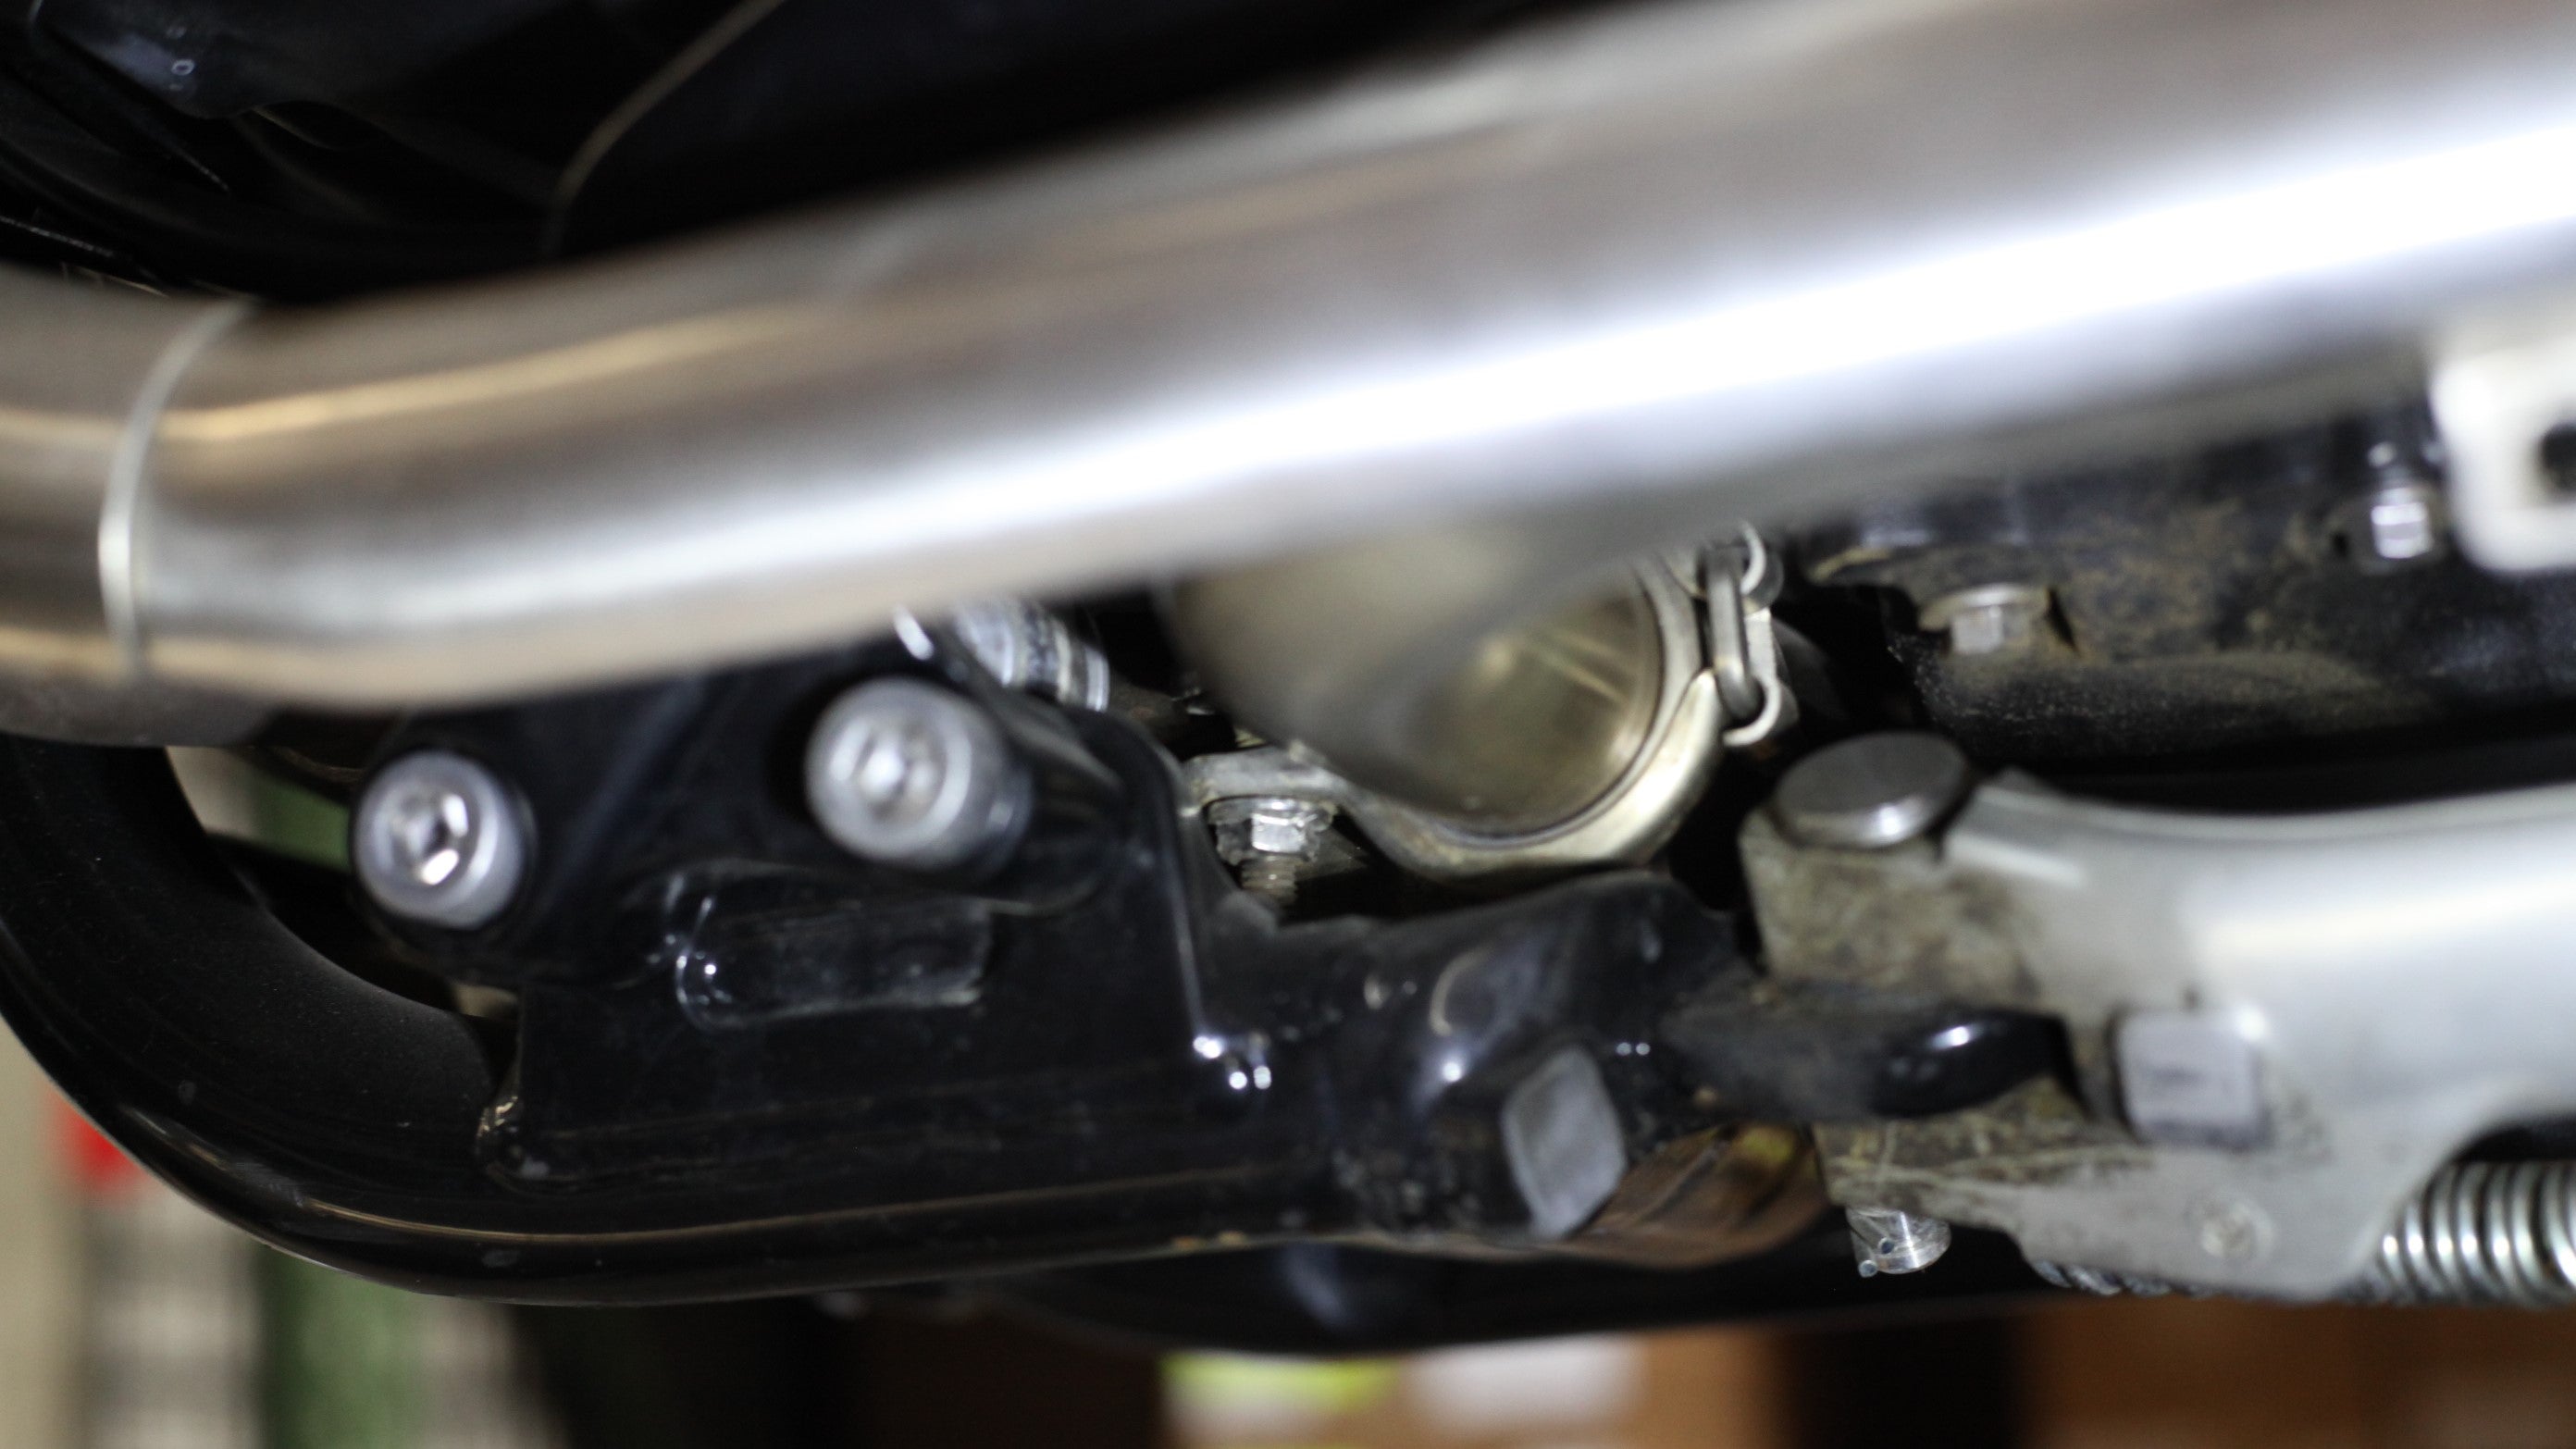
6 - Gently pull the right side heat shield from the tailpipe until it snaps free.
7 - Pull the silencer outward and away from the motorcycle until free from the catalytic converter and rear mounting bracket. Swing the silencer down and removing it from the motorcycle. 
8 - Use a 12 mm socket to remove the rear muffler mounting bracket. 
9 - Repeat removal steps on the right-hand side (exclude steps 4)
INSTALLATION
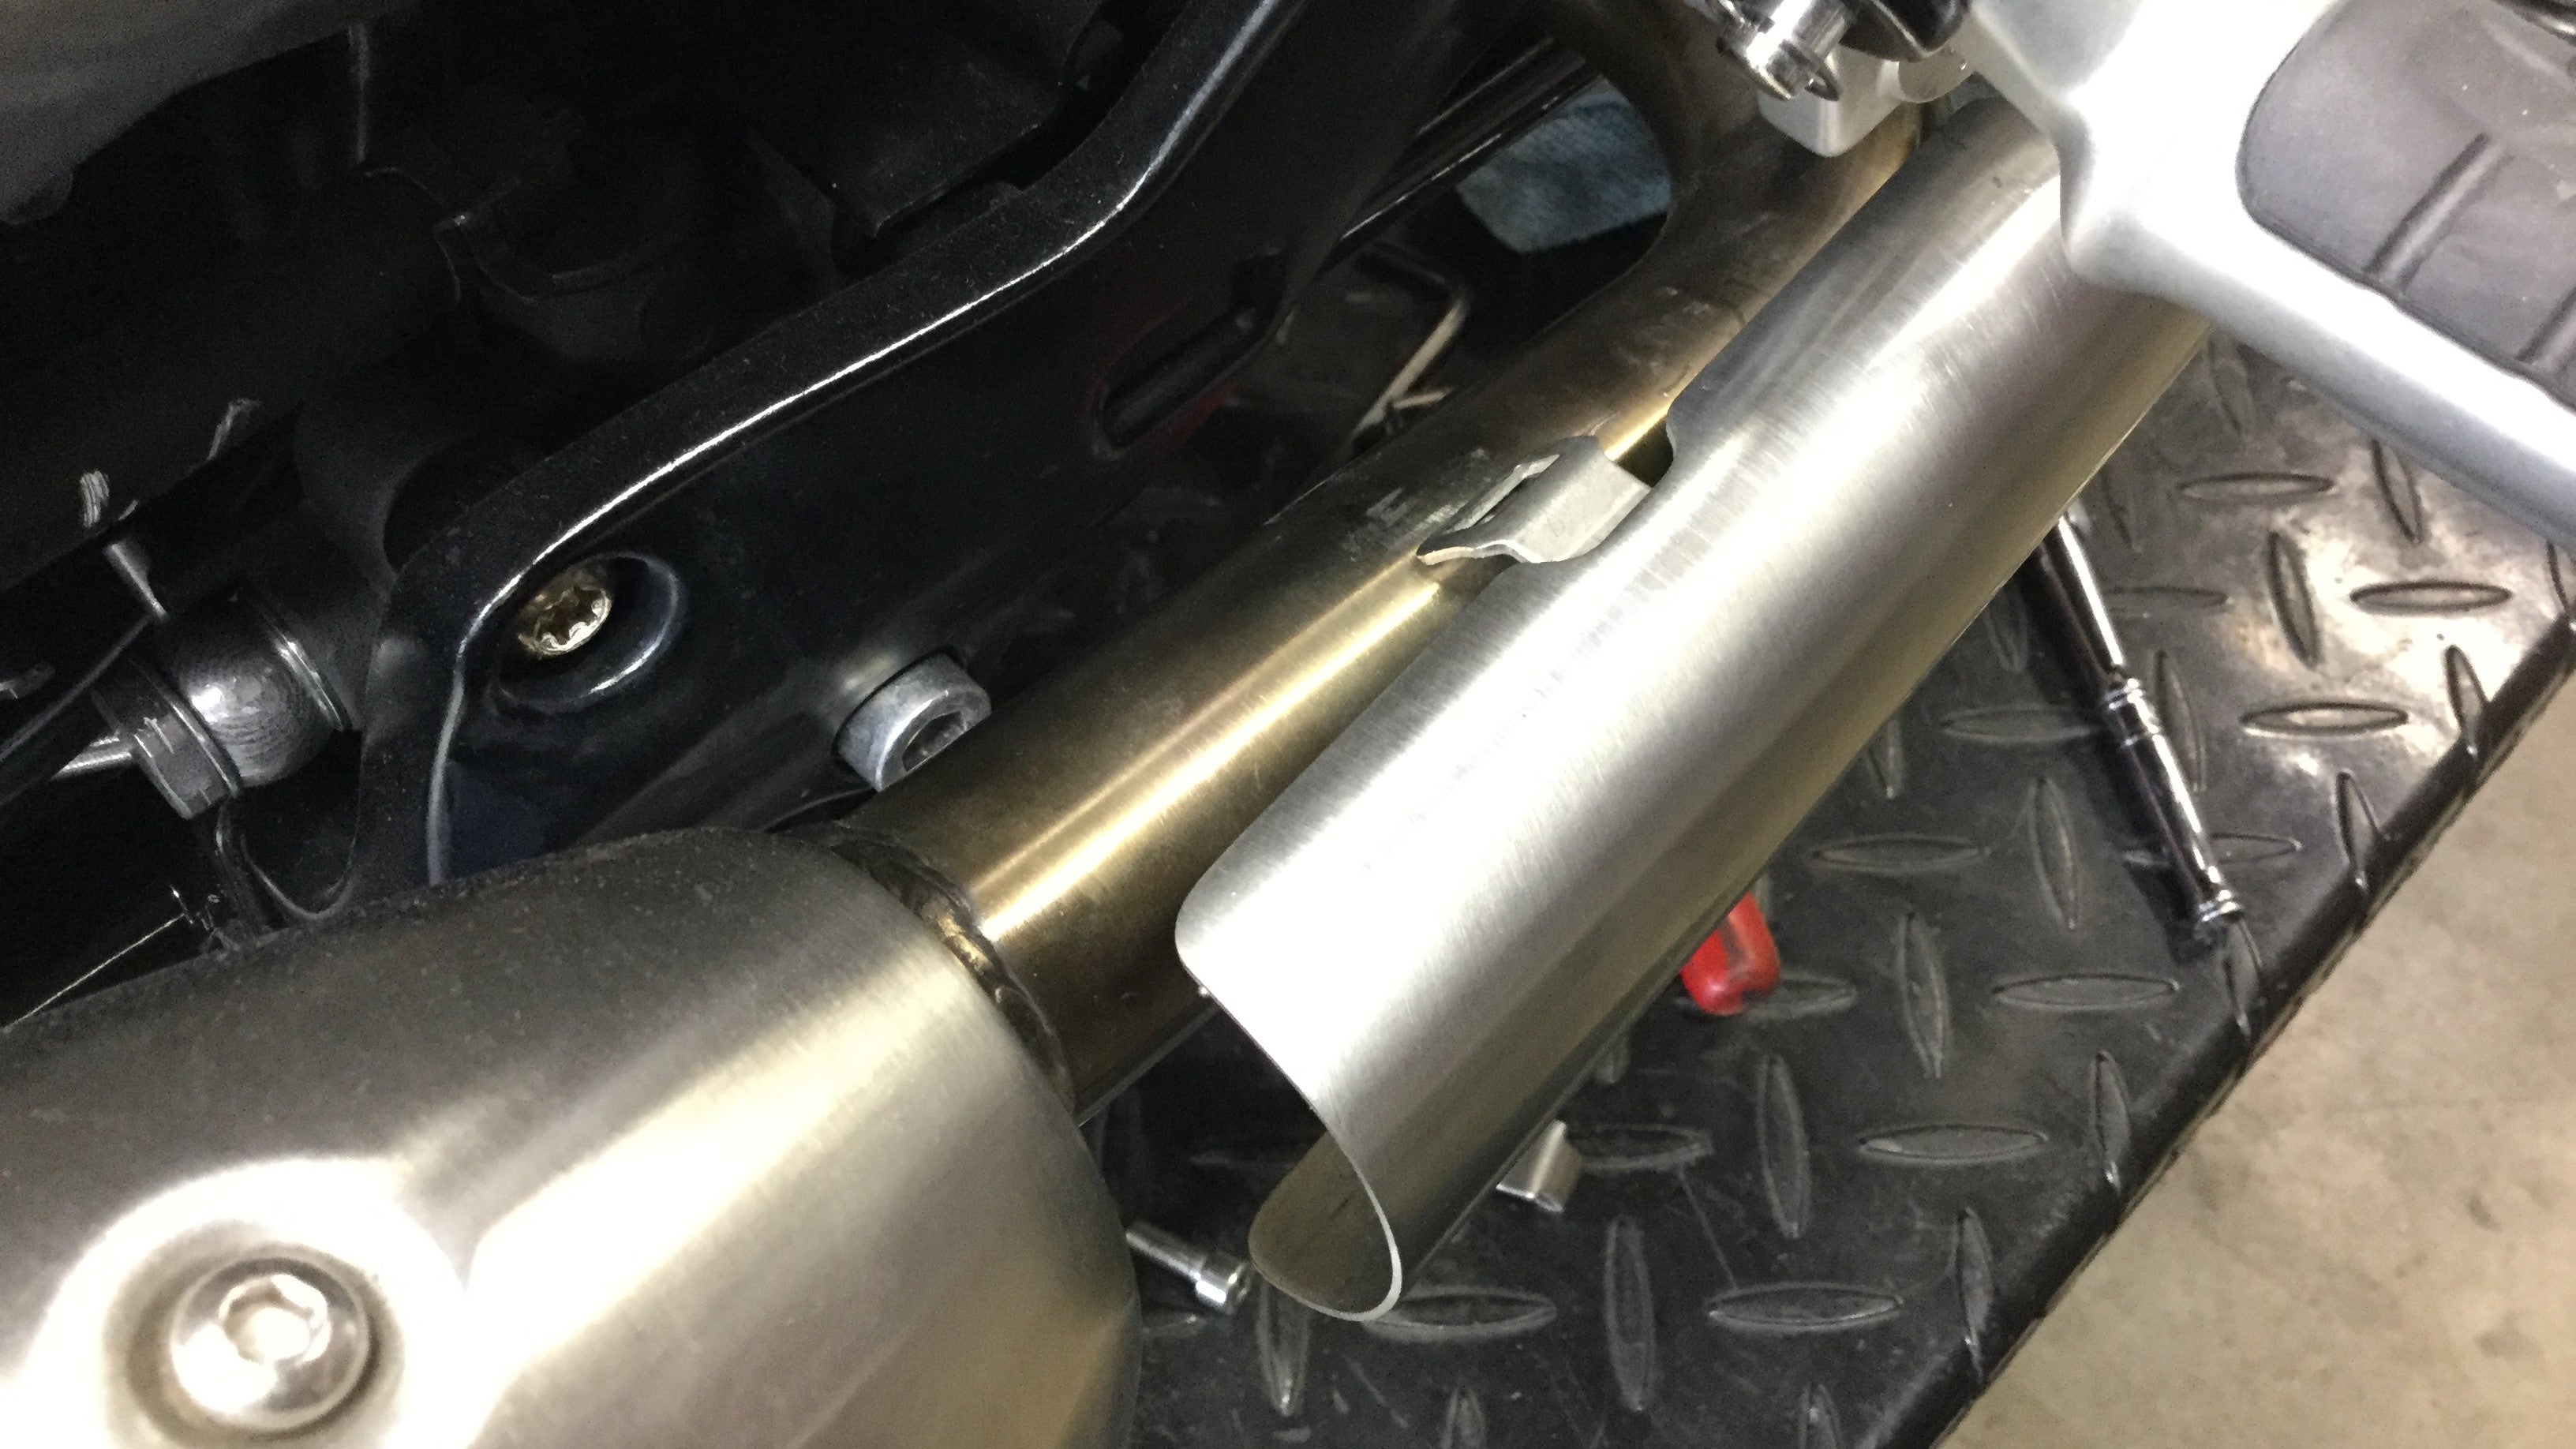
1 - Assemble British Customs kickstand bracket as shown. The rubber stopper goes in the smaller hole on the lower side of the bend.
2 - Use an 8mm Allen and remove the rear bolt from the subframe on the left-hand side of the motorcycle. 
3 - Place the kickstand stopper bracket into position and secure it with supplied 10 mm socket cap bolt. 
4 - Cycle the kickstand to get the bracket into the proper position, then tighten and torque to 40 Nm. (30 ft-lb)
5 - Install the Sleeper Pro onto the catalytic converter, taking care not to damage gaskets in the catalytic converter.
Pro Tip: It's easier to install exhausts with the back-end hanging down and then move it to the proper position.

6 - Lift Sleeper Pro into place and reuse 10mm bolt from factory rear mounting bracket to secure Sleeper Pro to the frame. Do not tighten at this time.
Note: the orientation of the mounting bracket. The slotted part should be at the top.
 7 - Use 12mm socket to tighten head pipe flange nuts and torque to 10 Nm (14 ft-lb)
 8 - Tighten the clamps on the catalytic converter to 8 Nm

 9 - Attach the heat shield to the tail tailpipe. Tighten camp firmly with 5 mm Allen and torque to 9 Nm.

10 - Go to rear mount and tighten the rear mounting bolt with 12 mm wrench to 19 Nm
 11 - Reinstall rear brake clevis onto the shifter shaft. There is a dot on the shaft and a hole in the clevis to ensure proper alignment.

12 - Use 5mm Allen and torque rear brake clevis bolt to 5 Nm.

13 - Repeat Steps 5-10 to install the right-hand Sleeper Pro Exhaust.
14 - Before starting the motorcycle, check for proper clearance between the exhaust system with the frame, suspension, wiring, etc.
Sleeper Pro installed on a Triumph Bonneville Bobber
